How exactly is Duolingo using Rive for their character animation?
An in-depth analysis.
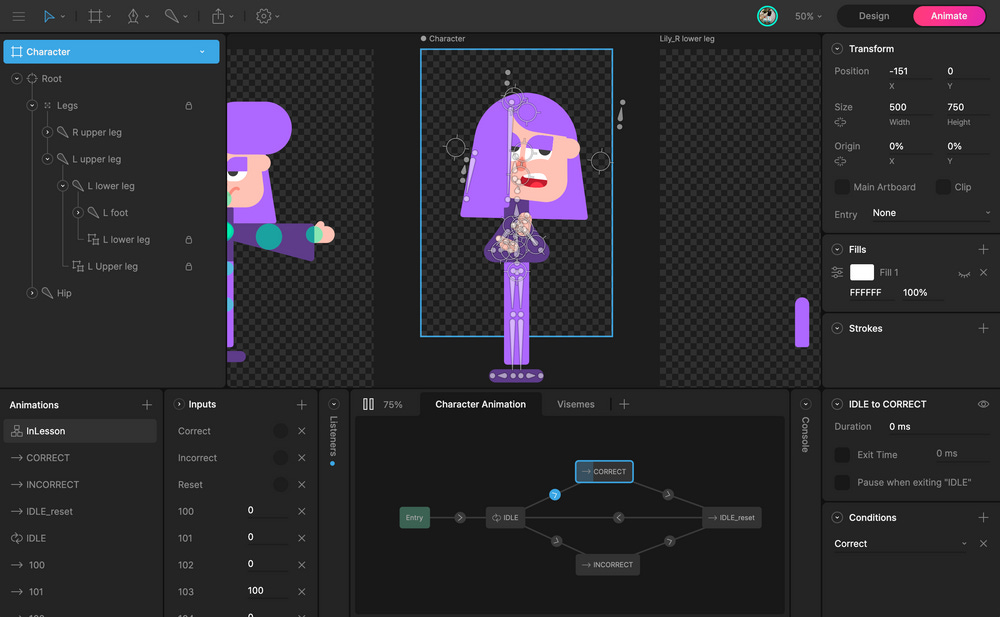
In the process of appeasing Duo, so I don’t find out "what happens”, I’ve spent a lot of time staring at their colorful cast of characters. I’ve wondered how they always feel so responsive. After stumbling across this post Duolingo put out, I feel I’ve come to some answers on just what makes them move in Rive. I’m not only using this as a way to learn from them but also teach you a little on how Rive works. Let’s dive in!
Artboards + Hierarchy
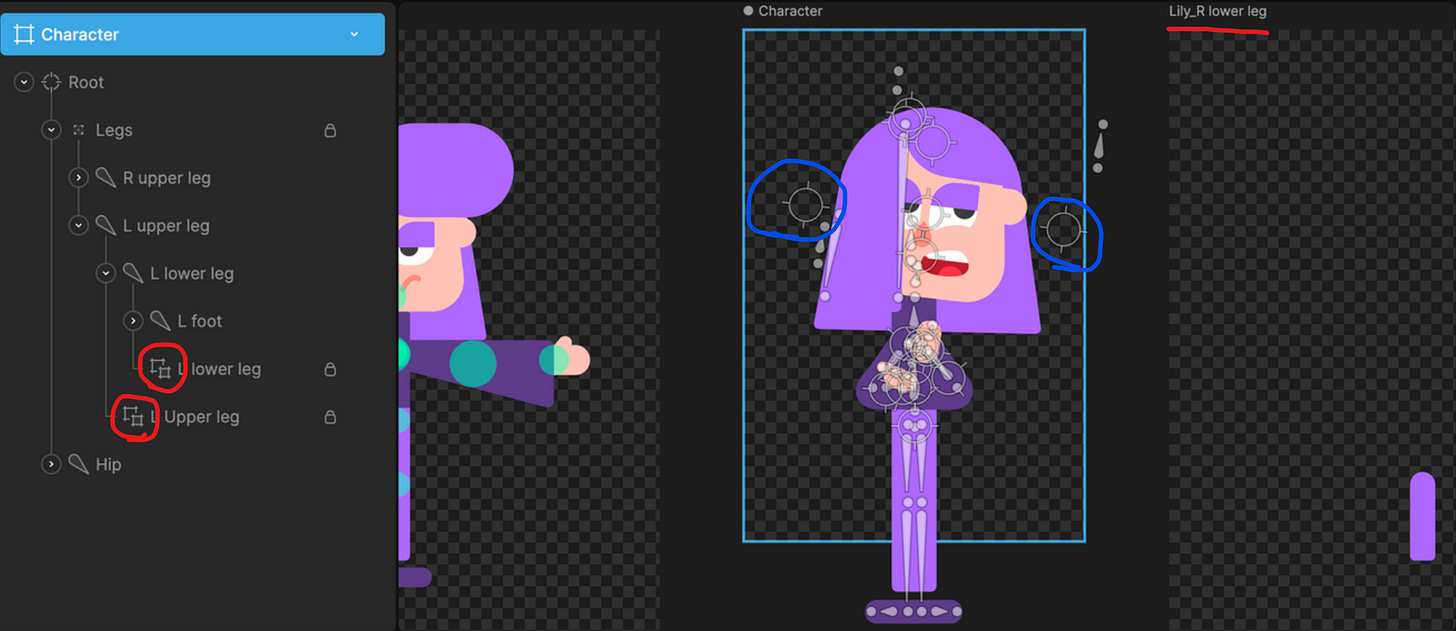
Art assets are broken up into nested artboards (red circles), these are proxies for other artboards (red underline), which are then combined into a main ‘Character’ artboard. This highlighted artboard, outlined in light blue, controls Lily during a lesson.
The fact they’re using nested artboards for each asset could suggest there are multiple ‘Character’ artboards in this project for different portions in the app; as this would allow them to keep assets consistent across them. For instance, the character’s joints are displayed in a T-pose on the artboard to the left with teal circles showing pivot areas. This would be used for internal reference.
Although, I’m not 100% sure Rive is being used fully across the app, because the only other area I could find these characters in was the celebration state after a lesson is completed. And, in these celebrations the character animation is radically different from what I can see is possible with this rig. For instance, there are smear frames in the limbs of some that couldn’t happen when organized the way they are in this screenshot. As well as there being full side profiles of the face & bodies.
These are most likely rendered in Lottie the same way their hero element is on their website.
A collection of in-app screen recordings of Duolingo’s celebration scenes. Source
The character itself is made up of a series of grouped bones that are split between the legs and hip, at least in Lily’s case here. These bones don’t seem to be binded to any paths but exclusively used for hierarchy linking. The floating group icons (blue circles) hint to me that some objects are being controlled by constraints. Constraints are assigned to objects in the hierarchy to control attributes of an object through another target object. One potential use for this is seen in the group icon between her eyes for controlling the eyelids.
Animations + Inputs
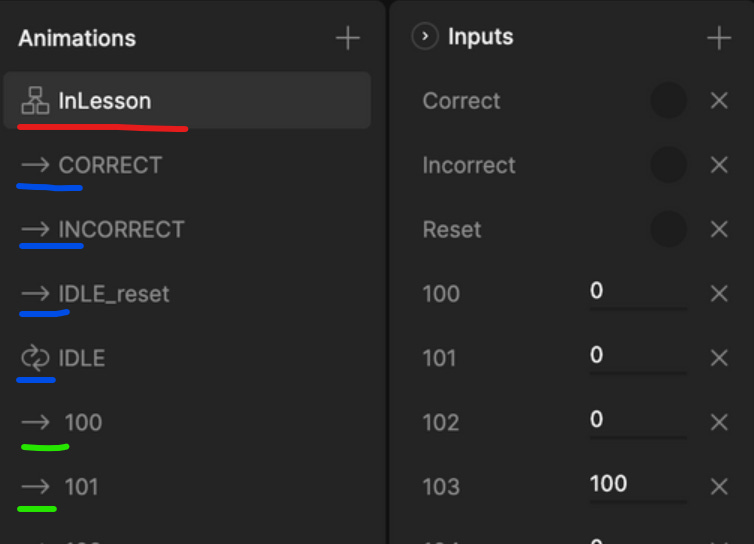
In Rive, the animation tab holds timelines (blue + green underlines) and state machines (red underline). A timeline is a collection of key frames that can be set to either one shot, loop or ping pong across them. Inputs are a set of variables specific to one state machine to control transitions and blend states. I’ll break down state machines in the next section
Duo has a group of timelines (blue underlines) for controlling the basic state loop of each section from a lesson: idle → correct/incorrect → idle_reset. The transitions for these timelines are controlled by trigger inputs, seen on the right, named ‘Correct’, ‘Incorrect’ and ‘Reset’. These triggers are accessible to the Duo Devs to use in the app.
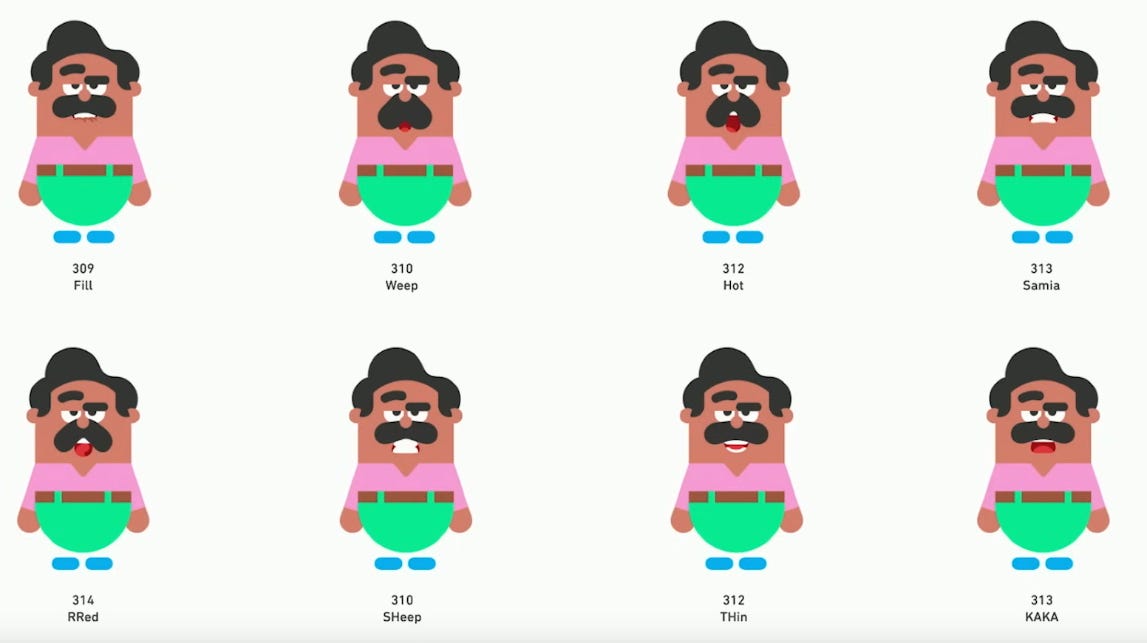
A viseme is a visual representation of a phoneme.
The other group of timelines (green underlines) probably consist of the path data of every shape for each viseme. This is supported by the naming conventions on their viseme charts matching the timeline names here. Each of these timelines have a corresponding number input of the same name.
My guess is that these numbered inputs are used to drive an Additive Blend state that holds every viseme timeline in it. An Additive Blend state takes in multiple timelines and blends them together using multiple inputs. Each timeline is assigned its own input. So when the input ‘103’ is set to 100 the connected ‘103’ timeline is influencing that state by 100%. We can now animate between any 2 visemes by transitioning both inputs at the same rate from 100 to 0 and 0 to 100.
Borrowing this mouth from JcToon’s phenomenal login/signup experience to test my theory, I created a small-scale example. This is using 3 timelines in an additive blend state. Each timeline holds the path data of all effected shapes to make the different faces. Then I simply adjusted the values to tween between the different mouth shapes. It only shows 3 here but this can scale to support any number of variations.
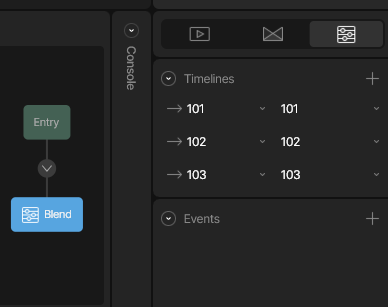
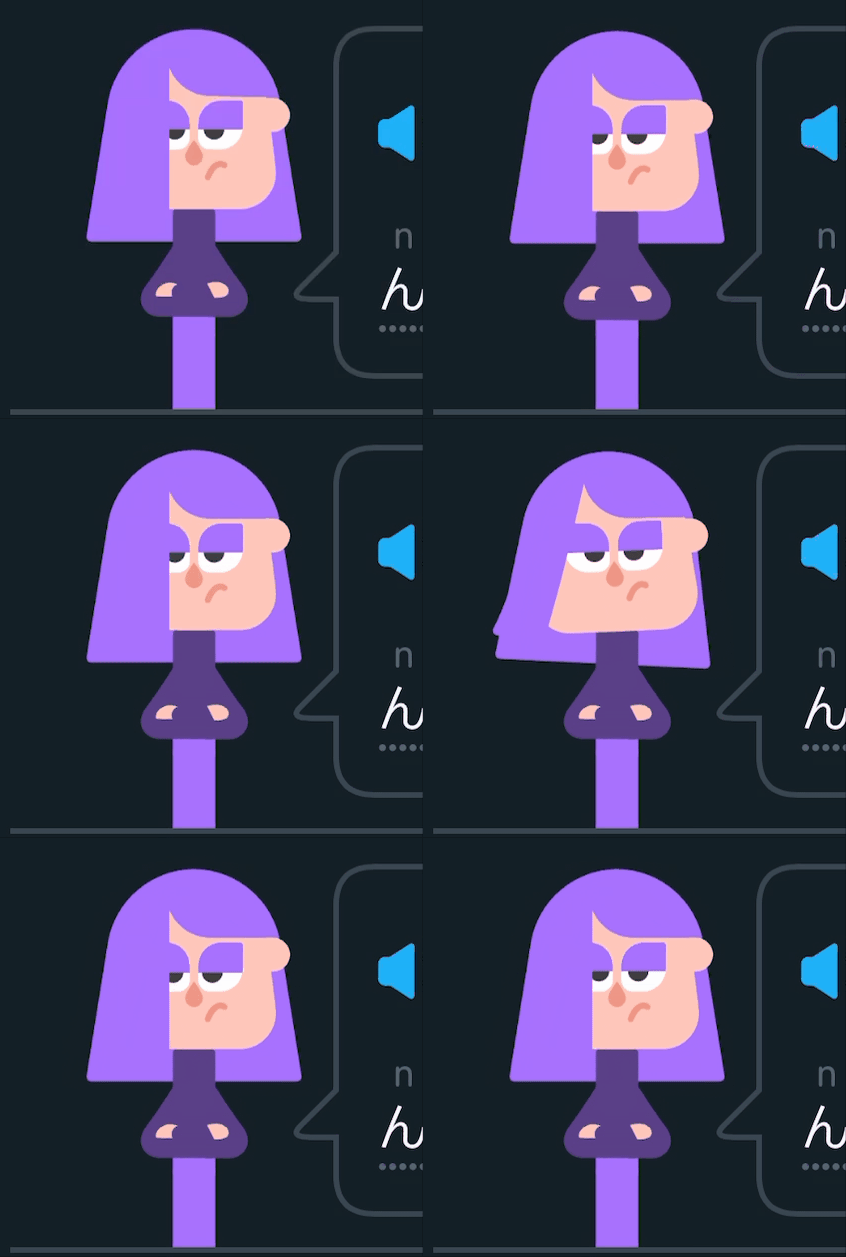
One thing that pushed me towards this method was when you slow down in-app screen recordings you can actually see it tweening between the different mouth shapes. When played back at normal talking speeds it creates some really smooth animation. Another benefit is it allows for flexible timings that not only account for snappy transitions but slower ones with no distracting breaks in the flow.
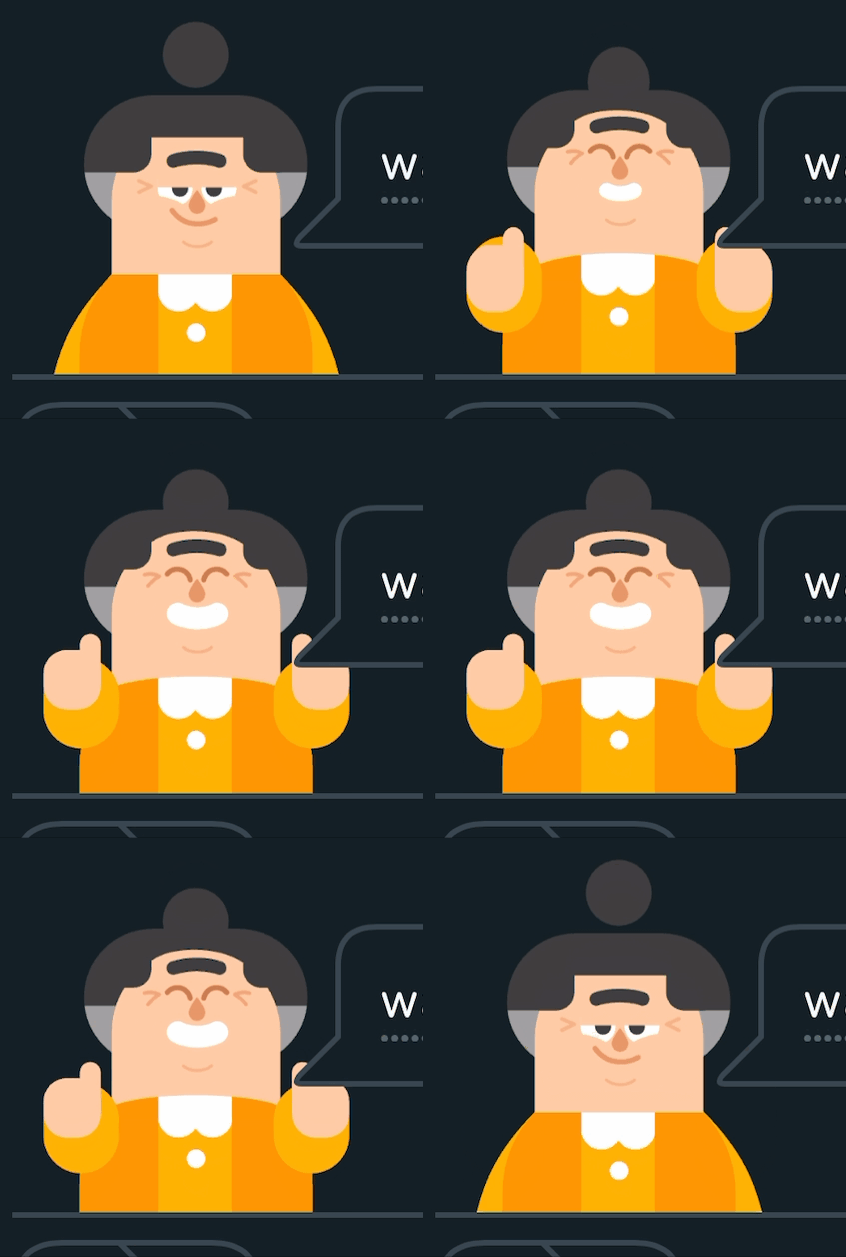
There are more prominent examples of tweening on slower phrases. Such as this screen recording of Lucy in a lesson. Notice some transitions don’t always matchup perfectly. This occurs when a timeline has objects that aren’t visible in another timeline.
The rate between these states are dynamically driven by some coding magic that takes into account the timing of everything in the sentence.
“To create accurate animations, we generate the speech, run it through our in-house speech recognition and pronunciation models, and get the timing for each word and phoneme (speech sound).” (Jasmine Vahidsafa & Kevin Lenzo)
My focus on this is simply how it’s set up in Rive and handed to the devs to control.
State Machine
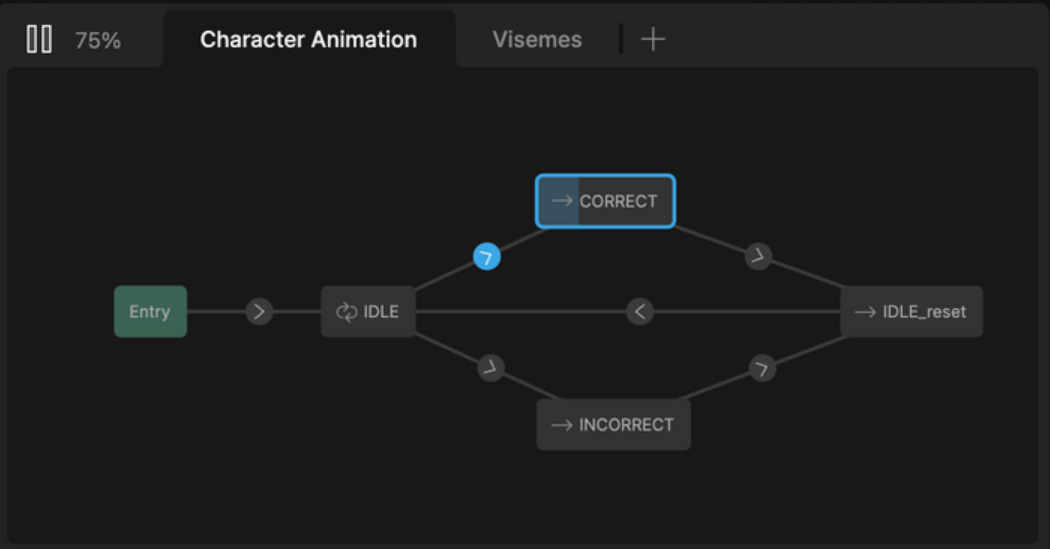
This is where the potatoes and molasses are of Rive! A state machine is made of layers. Each layer has states that control timelines with transitions connecting them together. Transitions have the ability to tween between timelines and create conditions for when to execute a transition.
This state machine is controlling a character while in a lesson. It has 2 layers. The first layer ‘Character Animation’ controls the core cycle of idle → correct/incorrect → idle reset and the second is the aforementioned talking system. These are both ran at the same time. So, if an audio is triggered it will continue in the state it was already in. The idling loop consists of a variety of behaviors — head nods, blinking, subtle pupil movements, eyebrows moving, looking left or right or up — that trigger in 10 second loops. These behaviors are sometimes isolated or combined to make larger movements.
Every character has their own unique idle loop. They all seem to run around the same time with a larger movement in the middle like Lily slightly moving her hair. These idle loops are transitioned into either a correct or incorrect animation that plays once before going back to the idle loop.
Conclusion
Duolingo uses Rive in an ingenious way to allow for responsive and interactive characters during their language lessons. With an additive blend state, they’re able to seamlessly tween between any mouth state and time it perfectly to each spoken phoneme using their in-house speech recognition and pronunciation models. This is combined with a state machine that brings the characters to life, allowing them to react to your answers in real-time. Weaving beautiful character animation with the marvel of interactive tech found in Rive it creates a dynamic, character-driven experience like no other to keep you coming back to a very persistent green owl.
I hope this was helpful! You’re now equipped to go out and build your own character rigs in Rive like Duolingo!
If you have any questions feel free to reach me at elisawicki.co/contact


this is honestly an insane case study, thank you!
Hi Eli !
I’m Dubai based and currently developing a project and Rive is the most suitable for my purpose.
I just want to thank you for making this post because I’m learning Rive State Machine and this kind of posts help me a lot.
Please keep posting more blogs like this !